I’ve been rejigging and trying out new RF modules, with great results…
Whilst I was simplifying the GPS tracker project, I came across a new RF chip and a way of making the tracker lighter and smaller.
Light and small is a good thing when you’re asking young people to carry heavy rucksacks for a couple of days already! The old design was about 10x12x2cm in size, and weighed around 300g. I think I can get the new design down to 6x4x2cm and 150g.
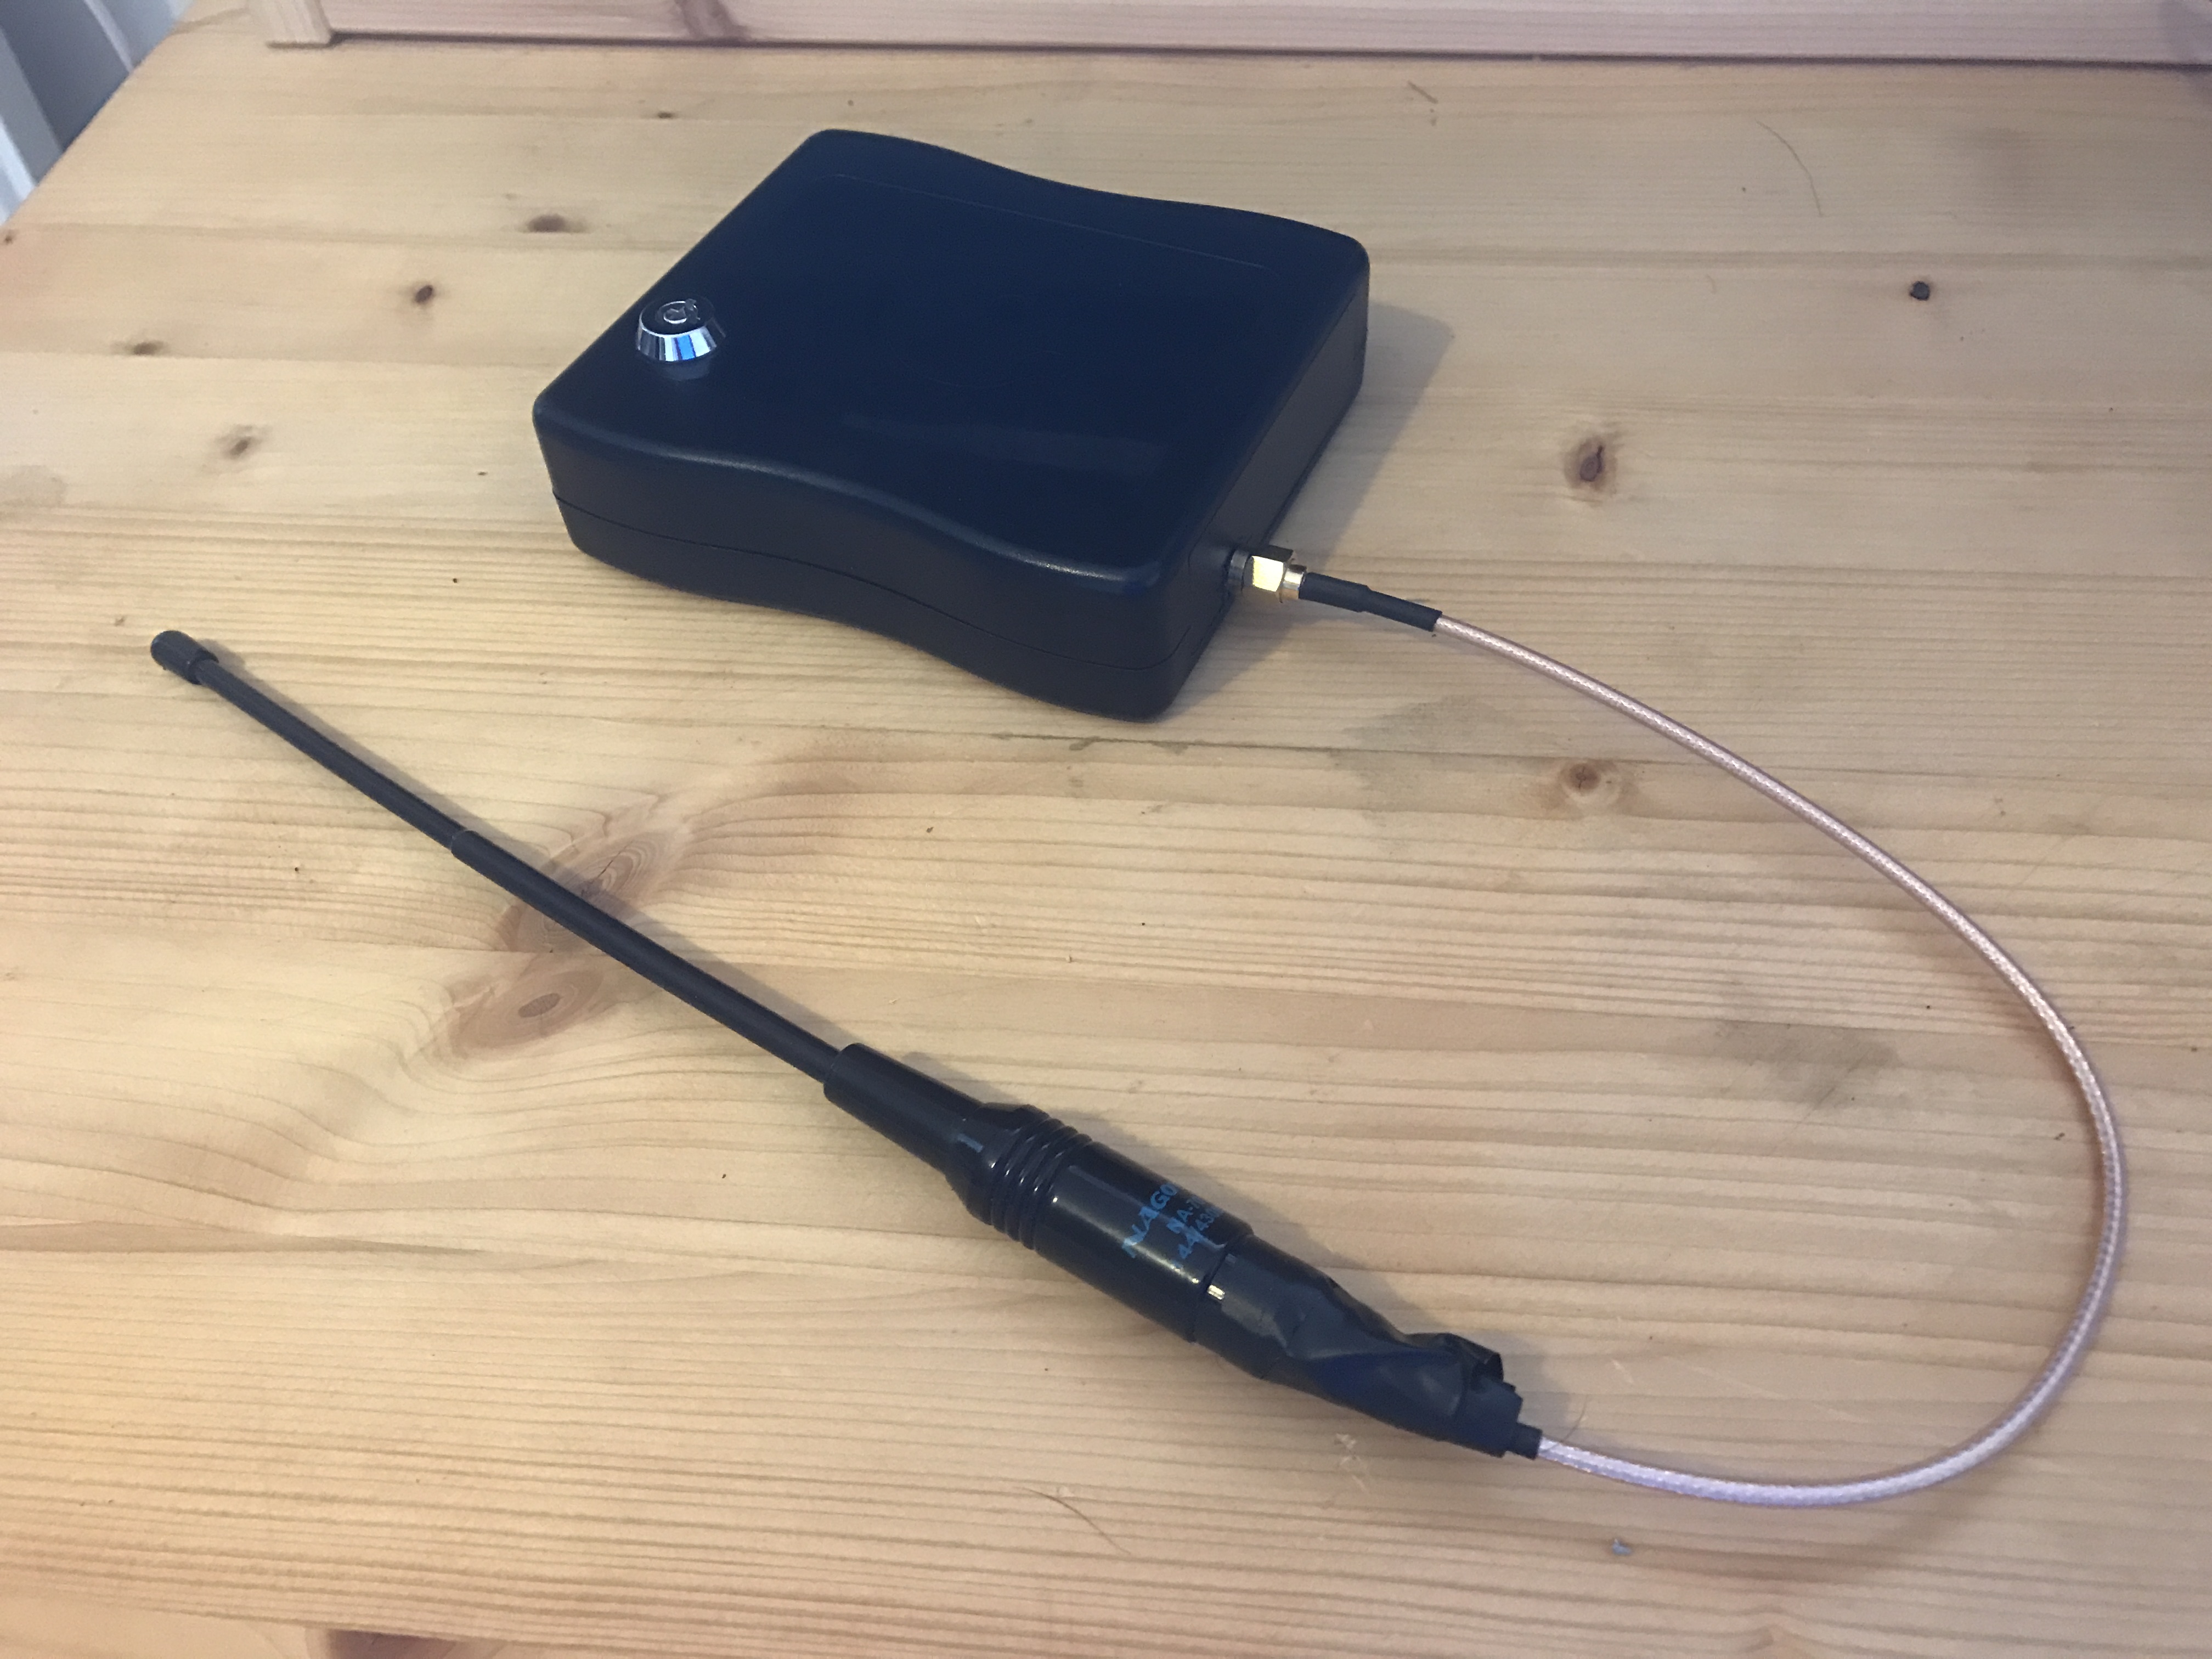
New Zeta 433MHz radio transceiver module
I’ve also found a new RF module – the rfsolutions.co.uk’s Zeta 433MHZ package. This is under £5 and represents great value, although a little harder to code.
Normally an RF module consists of 3 circuits layered on each other. The radio chipset itself (Normally a Silicon Labs si-4455 or similar), a control board module like the Zeta or HopeRF boards, and an easier to use CODEC board with controller that knows how to programme the RF module and provide a higher level, easier to use command interface.
The problem is three tiers means more cost. I’m happy to drop the codec (and thus drop the old 3DR Radio modules too) and use the low level chip.
The Zeta 433 MHz SO module from rfsolution’s is a great little transceiver too. I’ve bought two and had them working together within a day. I achieved this thanks to the ZetaRF library. After a little tinkering to get it working on 433MHz (and contributing the resultant code back to the main author), I was happily running a radio setup.
Simplified transmitter design
My old transmitter had an on board USB LIPO charge solution for convenience. Really though, you’d need the ability to swap out the batteries anyway when in the field. Also you’d want to cover those USB ports when using the device to prevent water, grime or damage. As you’d expect users to access the internals anyway, I may as well just get them to do it to charge the batteries too. SO I’ll remove the LIPO charger from the box.
This then saves cost, weight, and space on the tracker. Oh and as I’m using 2000mAh batteries I can wire a couple of extra resistors to my SparkFun USB LiPo charger to make it a 2A charger instead of a 500mA charger – charging the battery in 1 hour instead of 4!
This then leaves me with simply an Arduino Pro Mini clone @ 3.3V, Zeta 433MHz chip, SMA antenna connector, Key controlled on/off switch, and a battery. Quite a tidy package.
As I’ve already made the first tracker using the old 3DR radio though, I’ve finished the mockup so you get an idea:-
The Instructors/Supervisors kit will still look this size, but with an additional LCD 16×2 screen and a thumb joystick (like the wheel on an XBox controller) – four directions and push to select.
Here’s the future box and pieces for the smaller tracker kit which doesn’t need those additional supervisor kit bits:-
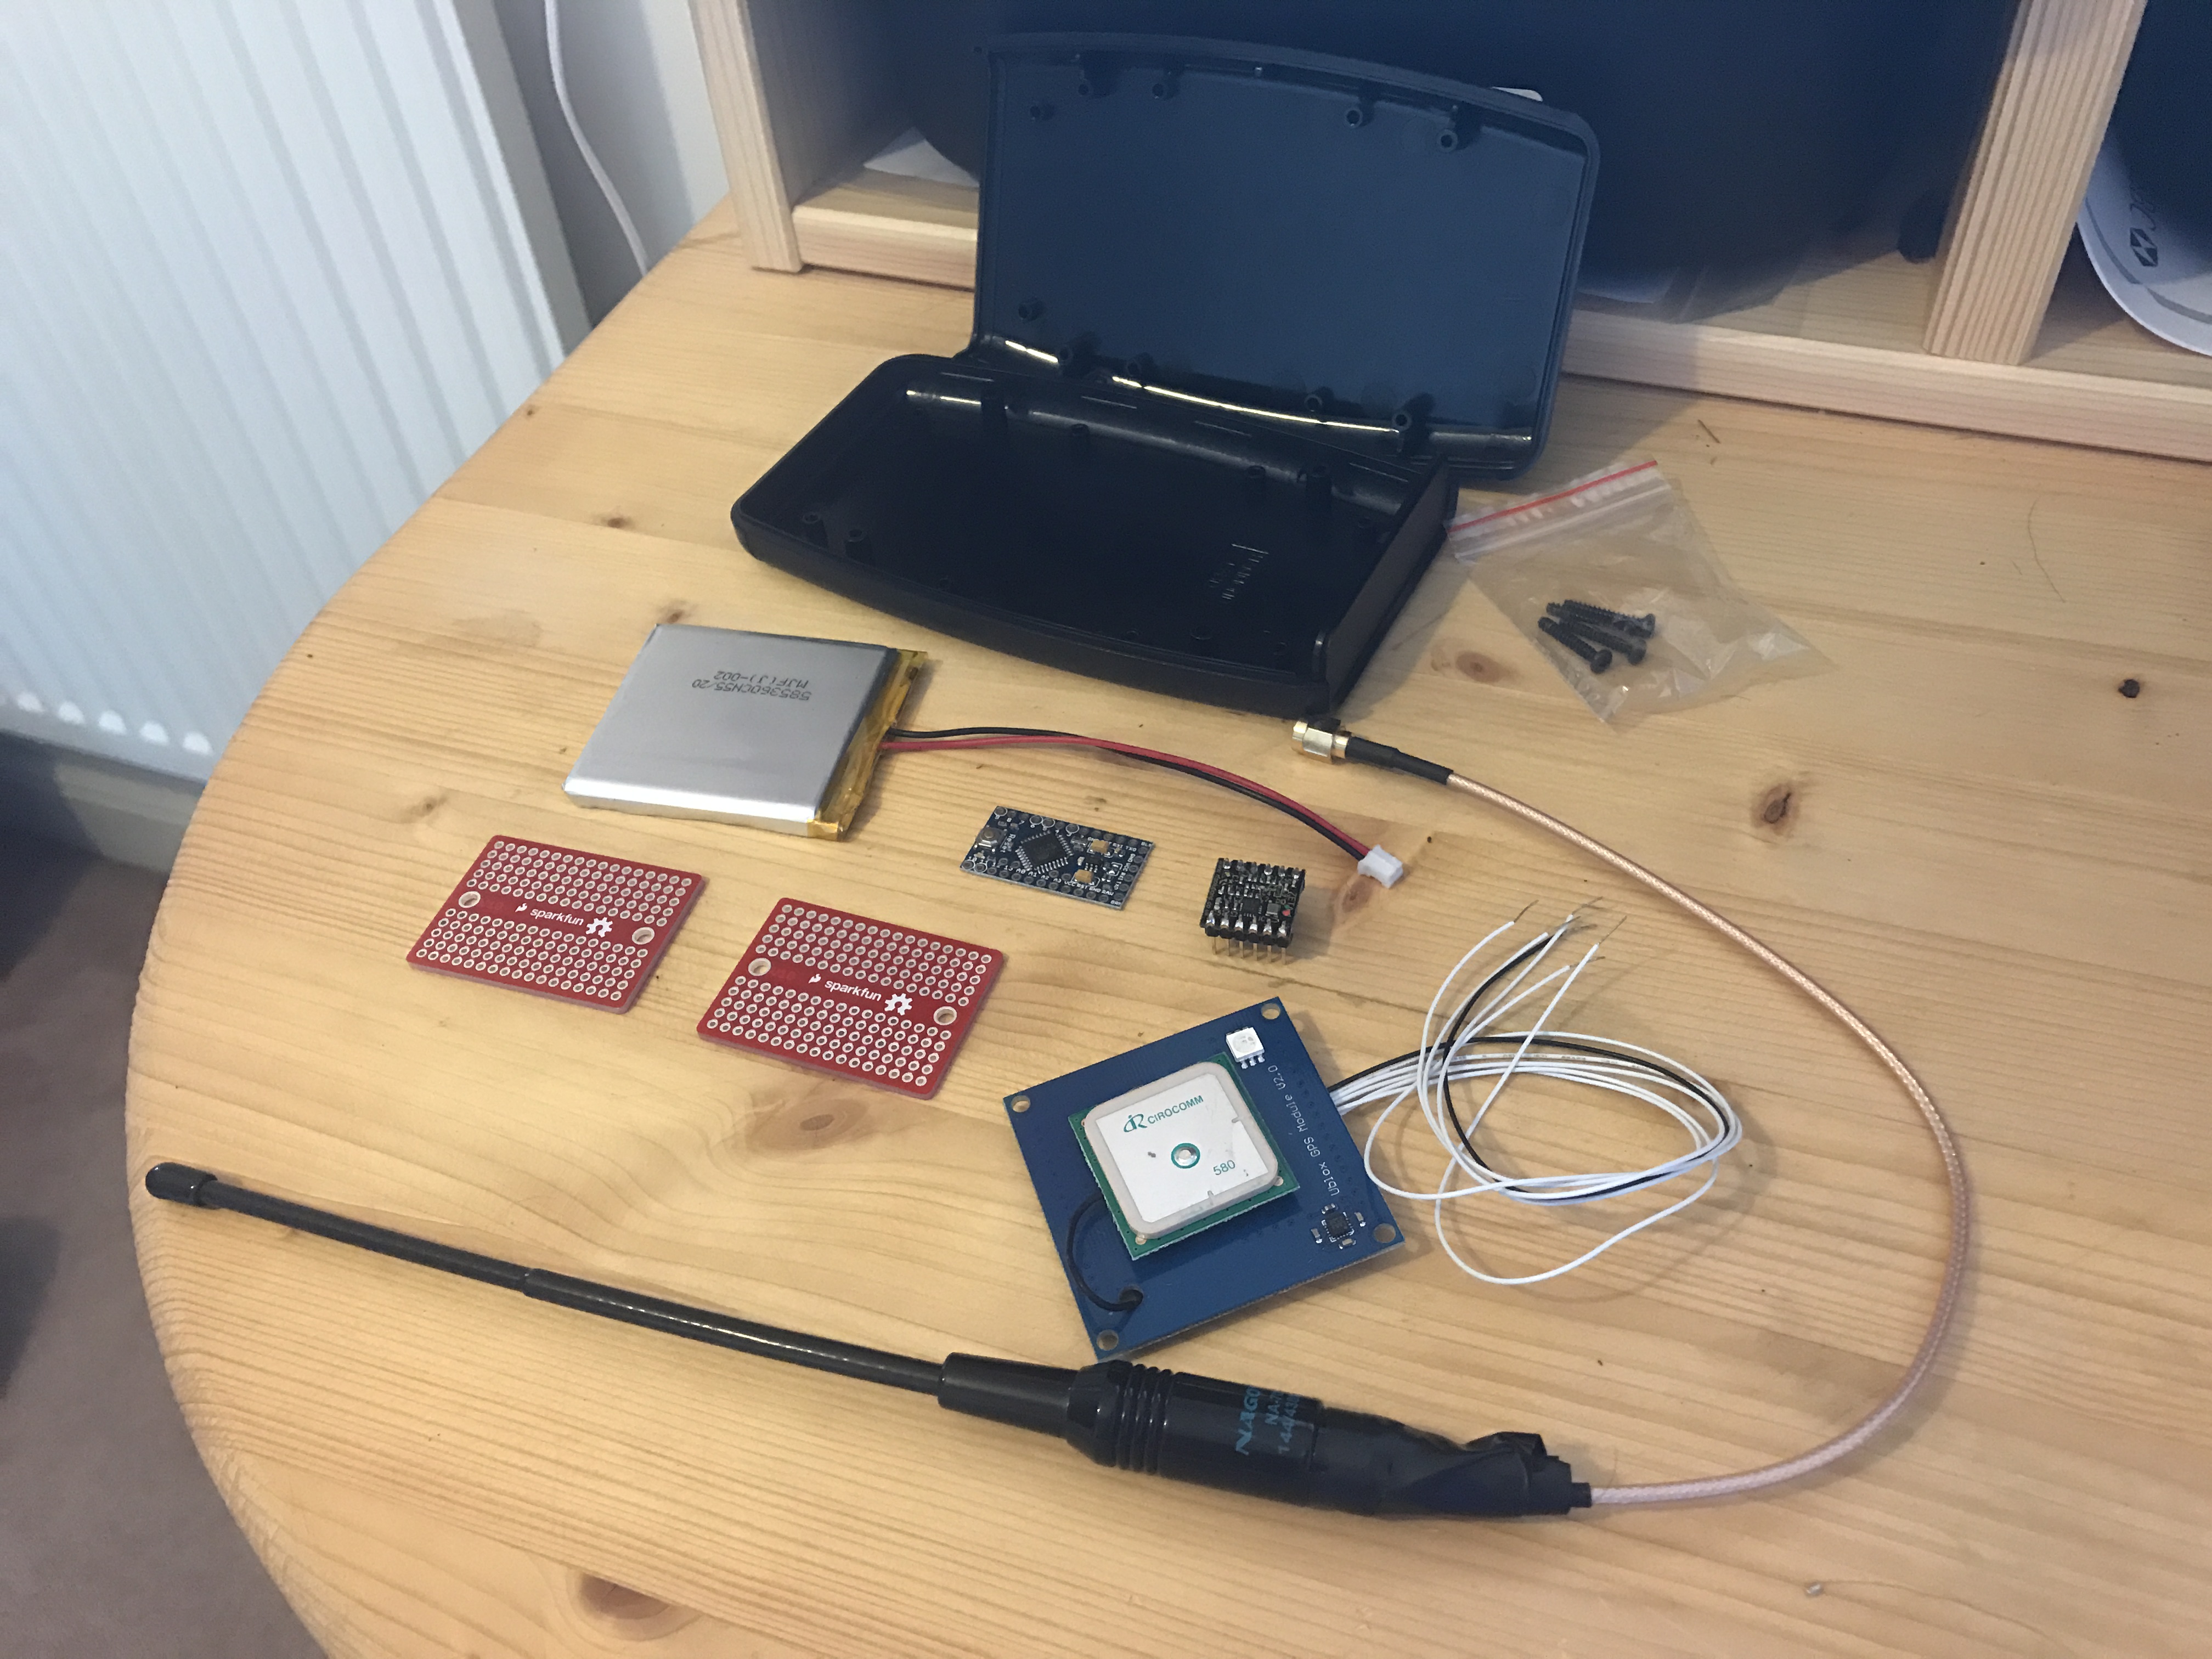
I’ll use an even smaller box if I can use a smaller or different shaped battery, and use a smaller GPS unit (GP635T or similar). Above is an old UBlox V2.0 GPS unit I used in testing previously.
Simplified design working
I’ve mocked up the transmitter and receiver circuits on a breadboard. Below is the current set up. (I’ll post wiring diagrams and instructions only when its fully tested):-
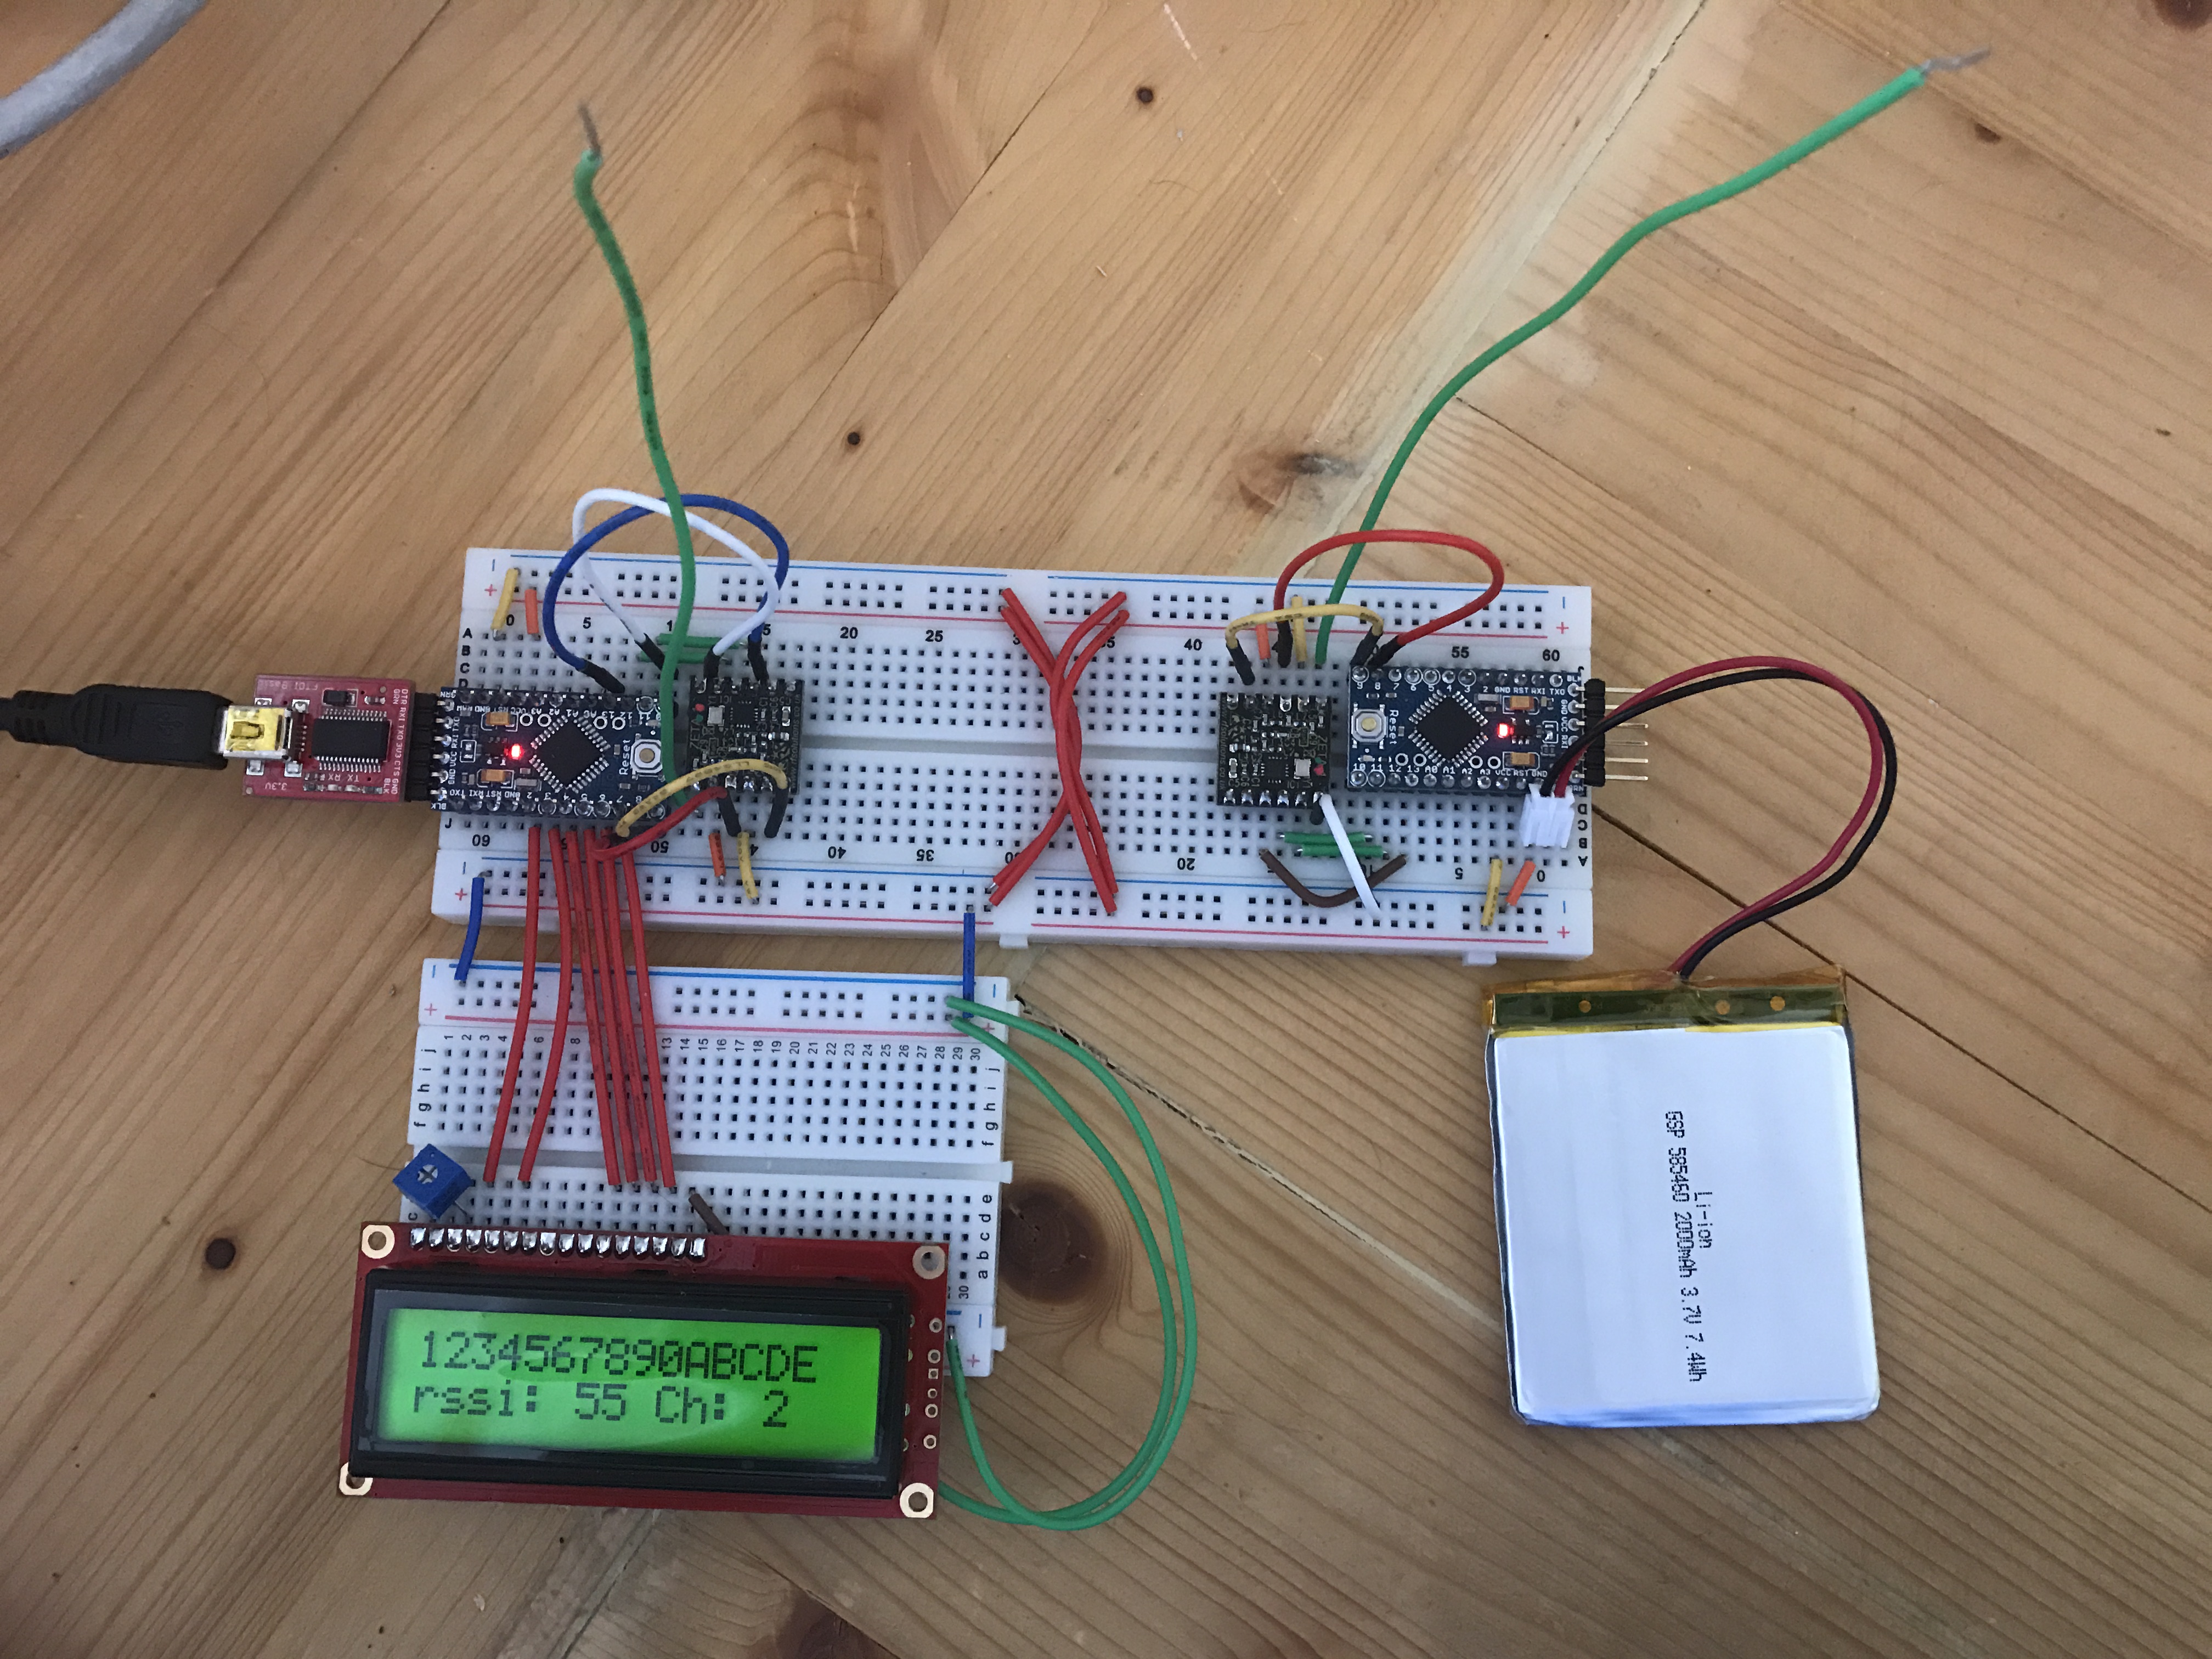
As you can see the PC powered (hence FTDI attachment) receiver is on the left, showing received message, signal strength, and channel, and the transmitter with battery power is on the right. The two circuits are on separate breadboard areas and so are not directly connected. Quite useful for a receiver transmitter pair!
No GPS unit yet… Need to source another cheap one as the previous models are all out of production. I’ll use the old UBlox for testing for now.
Ideally I’ll find an SPI GPS transmitter so I minimise my PIN use and make a more stackable friendly set of blocks.
Next steps
Pretty simple next steps:-
- Get a GPS unit working with the transmitter OR reprogramme the old 3DR transmitter to work with the Zeta chip receiver (As the unit it already built…)
- Convert the lon/lat to UK OSGB Grid References (easier to find on a map!)
- Test out the range when next going out dog walking!

Is it posible use Zeta 433MHz radio transceiver module with a raspberry pi 3? Are there any library in python for this transceiver?
Thanks!
Bye
You should be able to, it’s a common transmitter. It uses the standard SI chips within it.
I use the same chip that you use. But I can’t use the same library, and it is very difficult for me to understand the library as to write it in another language.